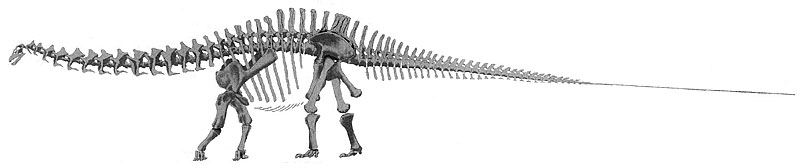
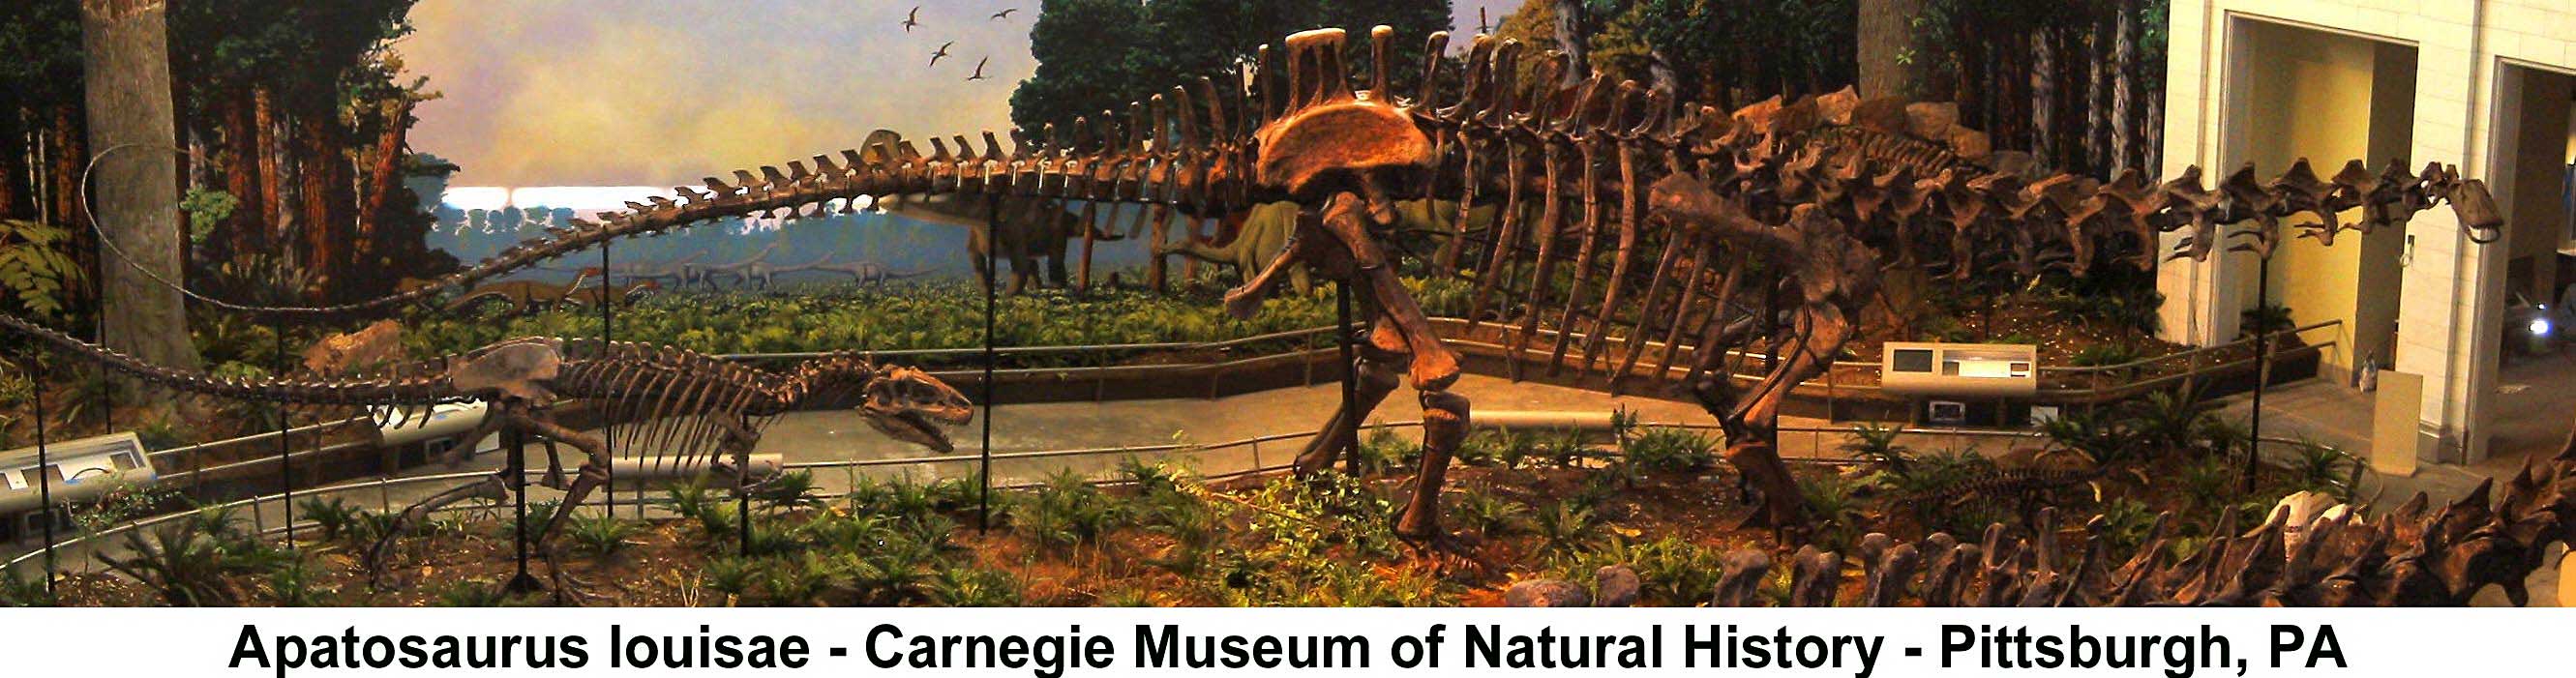
Platt reconstruction of Apatosaurus louisae CM3018 (drawn in 2002), as shown in The Apatosaurus Notebook (Platt, 2003).
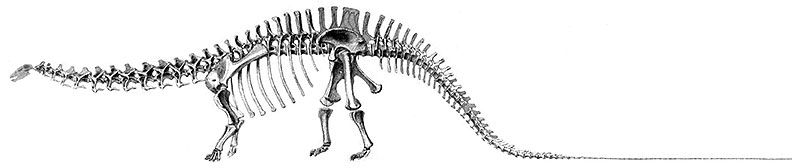
Apatosaurus louisae CM3018 as drawn in Osteology of Apatosaurus (Gilmore, 1936). The skull was unknown at the time and is from CM11162.This is the way Apatosaurus (previously called Brontosaurus) was shown until the Platt reconstruction (above).
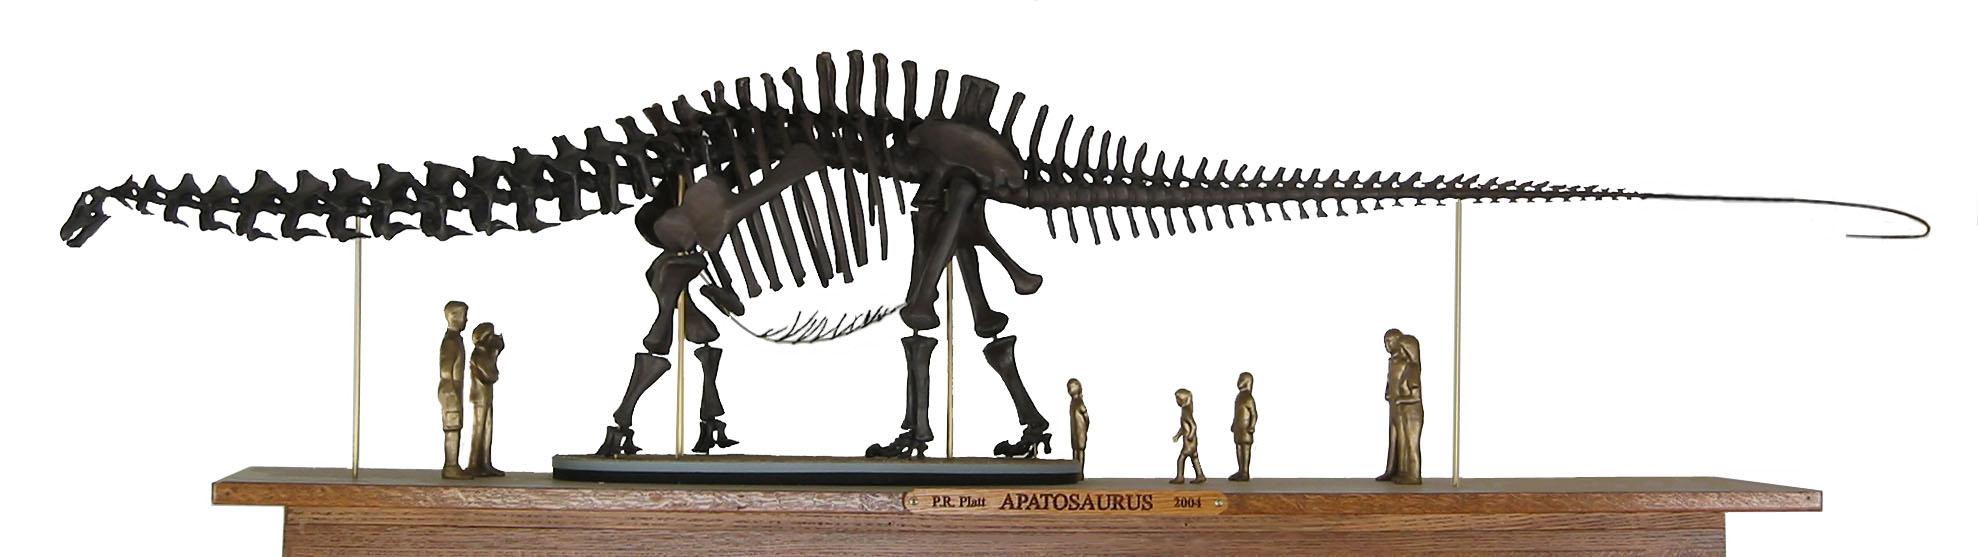
The model
The 1:12 scale Apatosaurus skeleton reconstruction by Philip (Phil) Platt is a masterpiece that took about 10 years to complete. How he built it is a great story and a tribute to his perseverance and determination to get it right. What he accomplished was to build the first complete reconstruction of an Apatosaurus skeleton in many decades, completely transforming its appearance. I've pieced the following account together from his book The Apatosaurus Notebook and from his generous and patient email discussions with me.
The project
“By training, I am a quality assurance engineer (retired from Boeing Airplane Co.), and getting it "right" was what the project was all about. Actually, in the beginning, all it was intended to be was a simple representation of a sauropod skeleton, carved from wood, just to see if I could do such a thing. But when guys like Ostrom, McIntosh, Bakker, ...etc., got interested in the project, I realized there was opportunity to do something significant.
"From what they told me, no one has ever attempted to carve an ‘anatomically correct’ sauropod model before. So, when I retired, I decided to give it a try. But I was inundated with questions on how to put the damn thing together. What I finally figured out was, that while those 'experts' could give me a whole shopping list of things they knew were wrong with how Apato skeletons have been mounted before they couldn't actually tell me how to put the model together since no one has seriously tried to erect an Apatosaurus in almost 70 years. And that explains why they were being so supportive.
“Eventually however, I was in way over my head. I needed HELP! So I put the master model together as best I could (I used a lot of wire and a lot of imagination) and hauled the thing down to the Society of Vertebrate Paleontology convention being held that year in Salt Lake City. I put it on display and asked for comments. The response was overwhelming! Like, one night there, there were six world-renowned paleontologists gathered around the model. And with my permission, they would twist a leg around this way, then discuss it, then try it a different way. Gad that was fun to watch! We all learned a great deal that evening. But the general consensus of the model was: The head was very good, and ... well ... the tail was OK. But everything in between ... let's just say, that's what most of the comments were about! So began about a 5-year, back and forth exchange, trying to evolve the configuration of the model, to make all the suggestions agree with a bunch of disarticulated bits of hard evidence.
“There came a point though, when it seemed to me that those guys had run out of evidence to argue, and were simply expressing differences of opinion, and that seemed to be a very good stopping point. So I finished off the model and let Rob Gaston build his molds from it. But what I wanted out of all this effort was something I could put on a shelf and brag to my grand-kids about!”
Photographic reference
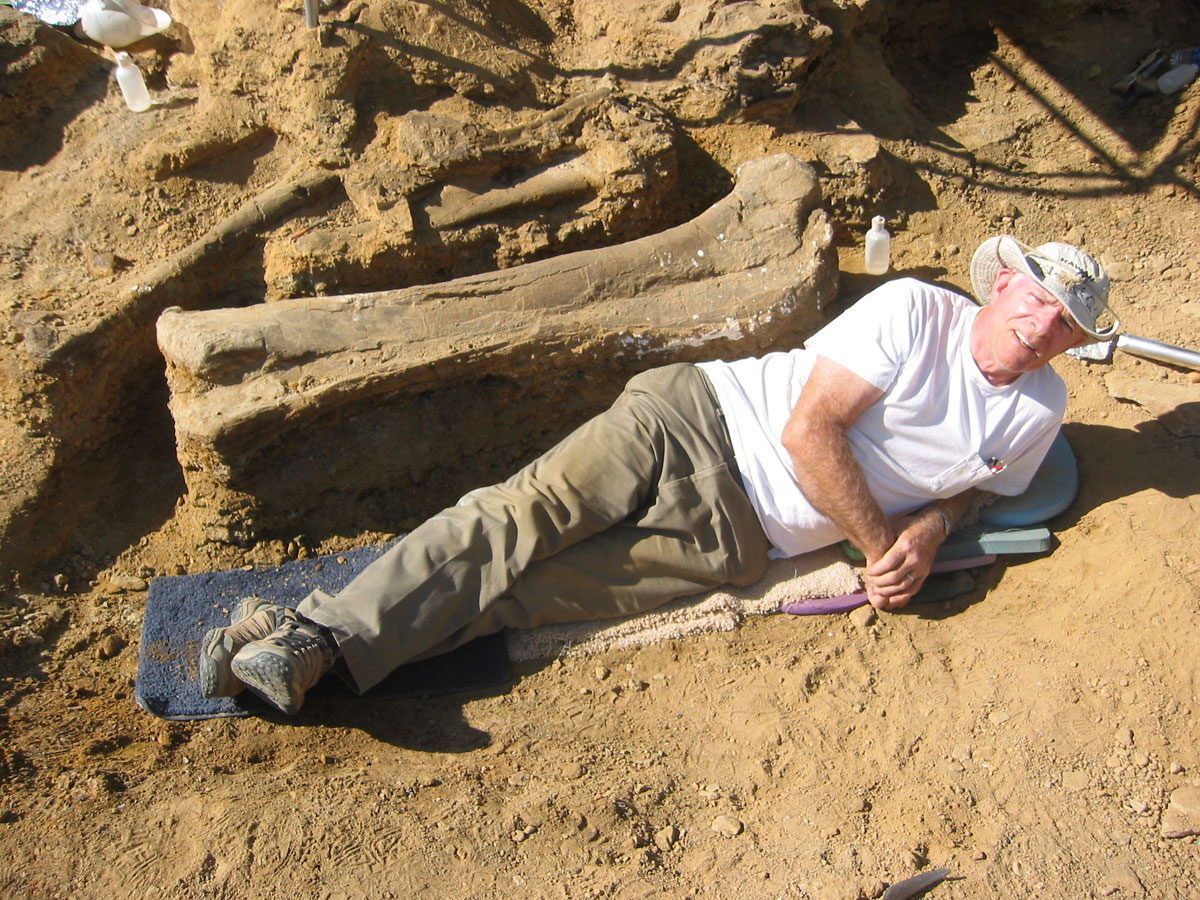
In 2005 Phil emailed me this summary of how he photographed the original CM3018 skeleton at the Carnegie Museum of Natural History and created accurate scale drawings of each bone as a prelude to building the model:
“I took 2-300 photos of the mounted skeleton, made the negatives into slides and projected the image of the bone through the back of a glass plate onto drawing film, and traced it. Took about three years to work out the procedures and get the drawings done. No, I didn't go wrestling 1000# rocks around -- They're all hanging up there in the air. The Carnegie did insist however, that I use their rolling gantry anytime I had to get up close and personal. Guess they didn't trust me up on a ladder. Otherwise, the cooperation they gave me was unreal! And all I ever did for them was criticize how out-of-date their dino displays were.
“But in appreciation of all her efforts, in 2002 I sent Mary Dawson, who was my official in-house ‘sponsor’ (in other words, she was assigned to make sure I didn’t steal or ruin anything), a copy of the Notebook. She wrote back saying that while she was looking at it, her new Director came in, grabbed it and ran off. (Don't know if he actually read it or just wanted to burn the damn thing.)”
Carnegie update
The Carnegie Museum of Natural History has since raised over $36M to renovate their dinosaur collection. In 2007 they opened the “Dinosaurs in Their Time” exhibit with new mounts of Apatosaurus louisae, Camarasaurus lentus, Diplodocus carnegii, Camptosaurus aphanoecetes, Allosaurus fragilis, Stegosaurus armatus, Corythosaurus casuarius, and Protoceratops andrewsi. This is fantastic news, but unfortunately the new mount of A. louisae is disappointing. This important original specimen, a national treasure, was remounted in an outdated pose (see below). It looks almost identical to Gilmore's 1936 reconstruction (see above) except the tail has been raised into the air. You can't help but wonder what research was done? Clearly Phil Platt was not consulted.
Preparation
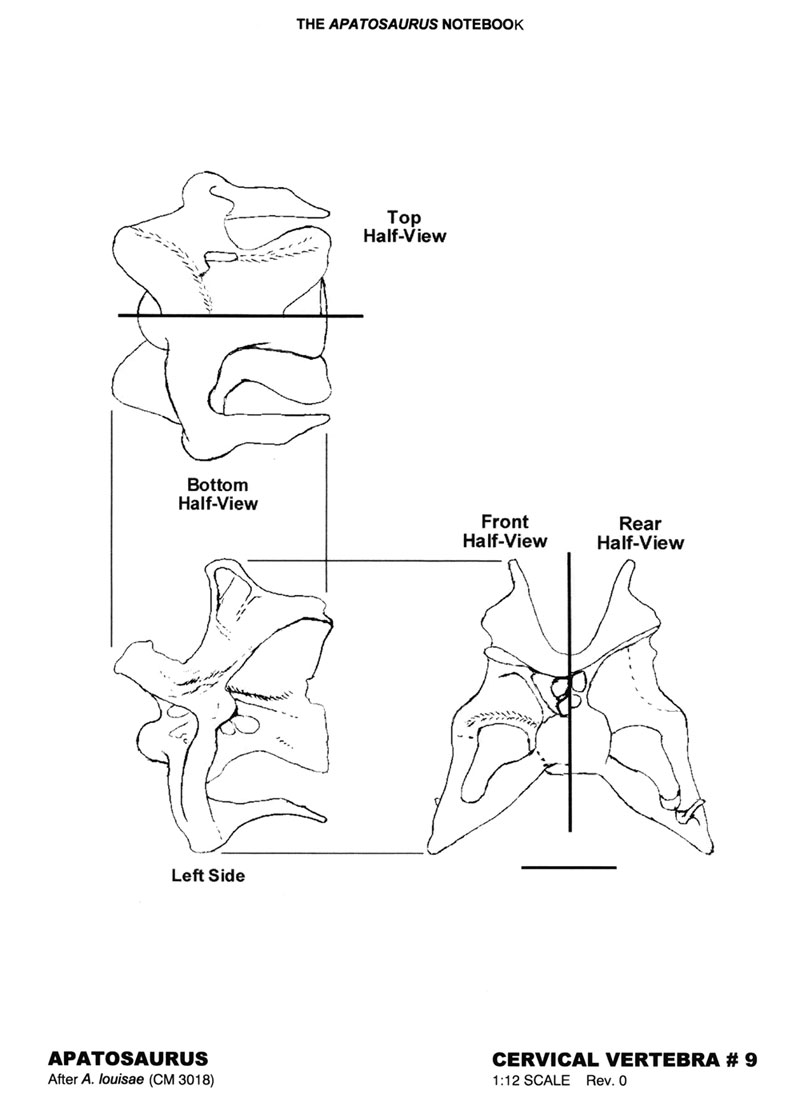
“To assure each piece of the model would be the correct size, shape and fit properly, the first step was to prepare accurate multi-view drawings of the skeletal structure. The second step was to prepare rectangular blocks of wood for carving the individual pieces. Honduras mahogany was chosen because of its exceptionally fine grain and carving characteristics.”
Carving and finishing
“Two views of each bone were cut and glued to adjacent sides of a wood block. he front or back view is generally applied first and for the vertebrae a 1/8th diameter hole was drilled through for the mounting wire. The side view was then glued to the adjacent side of the block, aligned with the hole or corresponding edges. The block was then band-sawed in two directions, first by carefully removing the top and bottom, then temporarily gluing them back in place for the second sawing operation. This provided a piece of the exact size and with sufficient indication of details that could be carved into round with reasonable accuracy.
“Carving was done almost exclusively using rotary burrs and stones, while referring to the drawings and to a number of photos of the bones taken from different angles. When shaped as closely as possible, each wooden replica was then soaked in a bath of hot, microcrystaline wax, to impregnate the wood for finishing. Additional wax was then applied using a carbon filament brush as needed to fix mistakes or to provide a base for sculpting detail. Wax also proved to be an excellent medium for texturing the piece, from very smooth to the simulation of rugose surfaces (i.e. extremely rough and uneven).”

“Some details of the model, as in the skull and the vertebrae, had to be carved somewhat thicker than actual. The reason being, the model was carved specifically with the intent to be cast in bronze using the lost wax process. Bronze however, when poured at the best temperature to avoid entrapped gasses (which cause porosity) is a relatively viscous fluid and freezes rapidly. Therefore very thin cross-sections had to be avoided.
“Other modeling techniques were also used. Certain pieces, like the cervical and dorsal ribs were too complex to be carved in wood. Those were made using a wire armature bent to the approximate shape needed, built up by painting with hot wax, then sculpted. The gastralia used a similar process except there a two-part epoxy, thinned with acetone was used. Early in the project, the pubes and ischia were carved from solid wax with the wire embedded for support. That process however proved unsuitable for most pieces as being too flexible. Subsequently most of the modeling was done using the carved "wooden armature" method.
“The ‘whiplash’ end of the tail proved impractical to make either in wood or by the painted armature method. There a 3/16th-inch diameter bronze welding wire was machine-turned to the required taper then hand finished to simulate the fifty individual bones.”
Mounting the model
“In the course of assembling this model many ideas were tried and accepted, others were not. The effort itself generated new ideas of how these animals should appear. The resultant configuration, while in a number of ways controversial, is overall possibly the most realistic representation of any sauropod dinosaur currently displayed. It should be recognized however that museums are not going to rush out and update their old sauropod skeletons. All the original skeletal mounts have their fossil bones (or plaster replicas) supported on heavy steel structures. These from a physical and even more from a financial standpoint are almost impossible to change. This is a major reason why modern dinosaur mounts have turned almost exclusively to lightweight plastic casts. Those can also be erected easier, in more realistic, dynamic poses, with mostly hidden, internal supports. But more importantly, it allows the irreplaceable fossils, each representing hundreds to many thousands of dollars to collect and prepare, to be locked safely away for future research.”
The bronze cast
“Now someone years ago had suggested ‘Phil, why don't you cast it in bronze?’ That seemed like one hell of an idea. But to do that requires making rubber molds of each piece of the model and, while I can make a fairly good mold, mold making is far from being my long suit. Anyway, so Rob lent me his molds, into which I injected hot wax, essentially making a wax copy of the skeleton, which a local art foundry then used to make ceramic molds, into which they poured bronze. I took the 40-some rough castings home, machined them down, welded and pinned all the pieces together and, it sits up there on that shelf.”